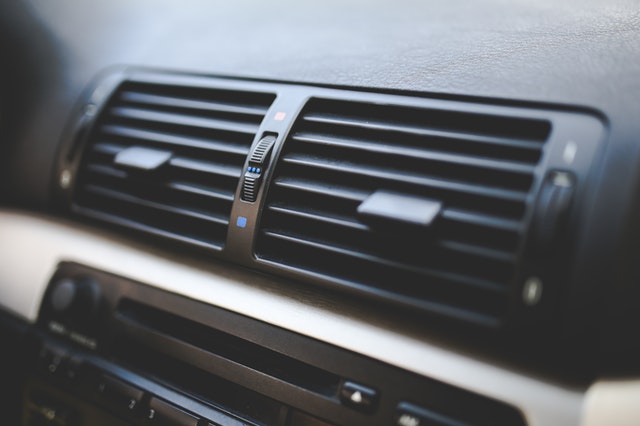
Picture this: You’re stuck in traffic on a hot summer day with the sun shining brightly overhead. The temperature continues to creep upwards until it eventually becomes too much. So, like any road warrior, you decide to turn on the air-conditioning. Uh oh – where’s the cold air? Instead of a refreshing cool breeze, you’re met with a gust that’s hotter than it already is inside the cabin. Has this recently happened to you? Are you scouring the web for answers on why your cars AC is not blowing cold air?
⚠️ If It's Broken, Don't Fix It - Get Paid Cash for Your Vehicle ⚠️

The most common reason is due to a lack of refrigerant. Usually, refrigerant lasts for several years before needing to be refilled. If this does not solve the issue, there’s likely a more pressing problem, such as a leak, a faulty fan motor, or a blocked condenser.
Thankfully, in this article, we’ll review each possible cause in detail, as well as how to proceed. But first, let’s take a quick look at how an AC system works.

How an AC System Works
Your AC system consists of a compressor, a compressor clutch, a condenser, a drier, a blowing fan, and an evaporator. While Freon (R-22) used to be the primary refrigerant, it was discontinued in the US in early 2020 due to being bad for the environment. In its place is Puron (R410A), which is a safer alternative that doesn’t deplete the ozone (though it does cost more).
The Process
- Compressor and Condenser – Converts from Gas to Liquid
The refrigerant starts out in a gaseous form in the compressor. When you turn on the AC, it tells the clutch to engage the compressor. The compressor raises the temperature and pressure of the refrigerant and sends it to the condenser. The condenser then condenses and cools down that gas (thanks to the AC fan), converting it into a liquid state.
- Receiver Drier – Removes Harmful Contaminants and Moisture
This liquid then gets sent to the receiver drier, which removes harmful contaminants and moisture. It does this by using a material known as Desiccant, which absorbs moisture that may have found its way into the AC system from the humidity in the air.
- Orifice Tube or Expansion Valve – Converts from Liquid to Gas (and Cools)
The refrigerant is still in a liquid state when it leaves the drier. But before it reaches the evaporator, it passes through either an orifice tube or an expansion valve. An orifice tube is a fixed nozzle that converts refrigerant from liquid to gas (it’s basically a small tube with a small opening on one end). An expansion valve, however, has moving parts that adapt to readings sent from the evaporator.
Expansion valves are generally seen as superior in that they’re more efficient and offer better temperature control. They both provide the same outcome, just in different ways. Once the refrigerant passes through either of these, it expands quickly, which not only returns it to a gaseous state but cools it down as well.
- Evaporator – Dispense and Repeat
The evaporator operates opposite of how the condenser works. It absorbs the remaining heat from the gas and cools it using the AC blower fan. By this point, the process is complete, and you should be enjoying a refreshing blast of cooled air.
Once the cycle is finished, the refrigerant (back in a gaseous form) returns to the AC compressor to start over again.
Now that you understand how the AC system works, and know the different components involved. Let’s review a few of the most common reasons your cars AC is not blowing cold air.
Common Reasons Why Your Cars AC is Not Blowing Cold Air
- Low on Refrigerant – Steps to Refill
The most common reason your cars AC is not blowing cold air when it’s hot outside is due to a lack of refrigerant. If you’ve read through our explanation of how the system works, then you understand how crucial it is to the process. A full tank usually lasts for a few years, depending on how often you run the AC.
Thankfully, adding more is simple. The first thing you’ll need is an AC manifold gauge, which costs around $40 and can be found either online or at a local auto supply shop. You can complete the job without one, but you are likely to over or under fill the compressor. The other thing you’ll need is a can of refrigerant, which costs between $50 to $100.
- The first step is to start the engine and turn the AC on max.
- You’ll then want to attach the gauge to the low-pressure port, which usually has a blue or black cap with the letter “L” on it. It’s located on the line connecting the compressor to the evaporator.
- Then, shake the refrigerant vigorously before attaching it to the other end of the gauge. Some gauges feature a valve and others a trigger. Regardless, release the refrigerant while gently shaking the can, watching the level along the way (every 15-seconds or so).
- Fill until the gauge shows it’s in an optimal range (as close to 40 PSI as possible). Then disconnect, replace the low-pressure cap, and check if your AC system is blowing cold.
If your cars AC is still not blowing cold air after a recharge, it’s likely a clog in the system or a faulty part.
- Refrigerant Leak
There’s also the possibility of having a refrigerant leak, which can be tough to track down since once it’s exposed to air, it instantly evaporates. Leaks typically stem from a cracked hose or worn gasket or seal, but may also originate inside the compressor.
Signs you have a leak include hearing an audible click while the AC is on, oil residue around the AC hoses and pipes, or frequent ON/OFF cycling of the system. As well as hearing a hissing sound from the AC system while it’s off.
Using a Fluorescent Dye
How do you check for an AC leak? The first option includes using an ultraviolet leak detection dye, which usually runs between $20 to $60. But first, you want to make sure your refrigerant is full (some products already contain fluorescent coloring). Be sure to follow the guidelines on how much to add.
Once you’ve added a small amount, give it up to a week to show up. Then, scan your AC system with a UV light and search for a fluorescent green or yellow leak.
Using Water and Soap
An alternative way of finding an AC leak involves creating a soapy solution and spraying it along the different components of the system. Make sure your refrigerant is full first, and then scan the system for bubbles while it’s running on max.
Repair Small Leaks with an AC Leak Sealer
These products usually cost between $30 to $50 and are great for smaller leaks. They come in a compressed can with a nozzle that connects to the low-pressure port. They remain a liquid until they encounter a leakage point, at which point they seep out and form a seal. Unfortunately, they can also lead to issues, like decreased AC performance or clogs in the receiver drier.
- Clutch Cycling Switch Failure
As mentioned earlier, the clutch is in charge of engaging the compressor, which converts the refrigerant from gas to liquid. Usually, when you turn on the AC, you will hear a “clicking” sound, followed by cold air. If this doesn’t happen, it’s likely the clutch. However, this usually stems from further issues, such as a faulty compressor or a fuse that has blown.
Sadly, replacing a compressor clutch is somewhat complicated. It is possible to do it yourself, but it might be better to take it to a professional if you don’t have any mechanical experience. Expect to spend between $700 to $800 for the entire replacement (including labor).
- Blocked/Broken Condenser
If you read through our explanation of how your AC system works, then you understand how significant the condenser is. If it’s clogged or faulty, then the refrigerant won’t convert from gas to liquid, which is a vital step in the process.
The first thing to check for is a blockage, which usually results in a rattling or howling noise coming from the condenser. You might also notice a “clunking” sound caused by a safety shutoff feature, which engages when a lack of pressure is detected.
While you can clear a blockage yourself, it does involve removing the condenser, dismantling it, and wiping it clean. Thankfully, there are also AC system cleaners you can buy to help flush out any obstructions.
If it turns out you need a new condenser, the cost of hiring a professional range from about $450 to just under $1,000 (including labor).
- Fan Motor Failure
As stated earlier, fan motors are not only essential for dispersing the cold air, but also for cooling it in the first place. Some systems have a single fan and others have two, regardless, if they’re not working properly, your AC won’t operate as it should. The main sign to watch for is if there isn’t any air coming from your vents. Another symptom is if your engine starts to overheat since the cooling fans help the temperature in a safe range.
A visual inspection is the best way to determine if this is the issue. Look for cracks, as well as debris that might be obstructing their ability to circulate. They’re usually controlled by the thermostat switch, so it makes sense that if they’re not broken, and there’s no blockage, that the issue is electrical.
Parts and labor for replacing a fan motor typically run between $300 and $500. But this can reach as much as $800 depending on your vehicle.
- Compressor Issues
When there’s a problem with your AC compressor, the system doesn’t have enough pressure to send it to the condenser. Modern cars feature a lot of computers to keep them operating as they should, so the issue could be electrical. However, the most common cause of a faulty compressor is that it’s been sitting for too long without use.
One recognizable sign of a faulty compressor is not having hot air blowing from the vents. As well as loud noises while it’s running (squealing or grinding), or an issue with the clutch. It’s a very complicated part, which is why it’s usually better to replace one rather than attempt a repair. How much should you expect to pay? Between $500 to $700, including both parts and labor.
The Cost of AC Repairs
Nobody enjoys driving a vehicle that needs repairs, especially if it’s something as vital as your AC system. If your cars AC is not blowing cold air consistently, and you aren’t mechanically inclined, it’s likely time to bring it to a shop.
How much does an AC system repair cost? Here’s a breakdown of what you might expect:
- Inspection and Diagnosis – $80 to $120
- Refrigerant Refill – $80 to $150
- Minor Repairs (Cleaning, Clog Removal, Leaks, Clutch Replacement) – $150 to $800
- Major Repairs/Multiple Issues (New Condenser/Compressor/Fan Motors) – $1,000+
Remember to factor in transportation to and from a shop. Most will need your vehicle for a minimum of 3-hours, depending on their availability.
If Your Cars AC is Not Blowing Cold Air – Take Care of It
Neglecting an issue with your AC system will likely lead to more severe problems. Why take the risk in the first place? Instead, handle it promptly. First, check to make sure you aren’t low on refrigerant. This is a simple procedure that’s likely to save you around $100 or more at a shop. If that’s not the issue, inspect the system for a leak, which is reasonably easy to do at home. If there is a leak, go spend about $40 on a sealant. If there’s not, flush the system using an AC cleaner.
Beyond that, it’s likely something more pressuring, like a faulty compressor, condenser, or fan motor. Don’t suffer in the heat. Instead, get it diagnosed, resolve it, and be on your way.