Brakes are the unsung heroes of our vehicle’s safety system. They require regular inspection and occasional replacements. Dive deep into our guide to ensure your car’s braking system remains at its optimal performance.
⚠️ If It's Broken, Don't Fix It - Get Paid Cash for Your Vehicle ⚠️

1. Introduction to Brake Pads
1.1. What Are Brake Pads?
Brake pads are components of disc brakes. They are used in automotive and other applications. Brake pads convert the kinetic energy of the car into thermal energy by friction.
1.2. Importance of Brake Pads
They’re crucial for safety. Worn-out brake pads might lead to decreased stopping power, potentially causing accidents.

1.3. How Often to Change Them?
Generally, brake pads need replacement every 50,000 miles. However, depending on driving habits and conditions, it can vary between 25,000 to 70,000 miles.

1.4. Signs of Worn-Out Brake Pads
Some indicators include squeaking noises, longer stopping distances, and the warning light on your dashboard.
2. Tools and Materials Needed
2.1. Essential Tools
- Jack and jack stands
- Wrench set
- C-clamp or brake caliper tool
- A small bungee cord or rope
2.2. Materials
- New brake pads
- Brake caliper lube
2.3. Safety Equipment
- Gloves
- Safety glasses
2.4. Optional but Helpful
- Brake cleaner
- Rags or shop towels
3. Preparing the Vehicle
3.1. Safety First
Before starting, ensure the car is on a flat surface. Engage the parking brake.

3.2. Loosening the Lug Nuts
Using your wrench, slightly loosen the lug nuts of the wheel covering the brakes you wish to replace. Do not remove them yet.
3.3. Jacking up the Vehicle
Using the jack, lift the car off the ground. Once at a suitable height, place jack stands underneath for safety.
3.4. Removing the Wheel
Now, completely remove the lug nuts and take off the wheel.
4. Removing the Old Brake Pads
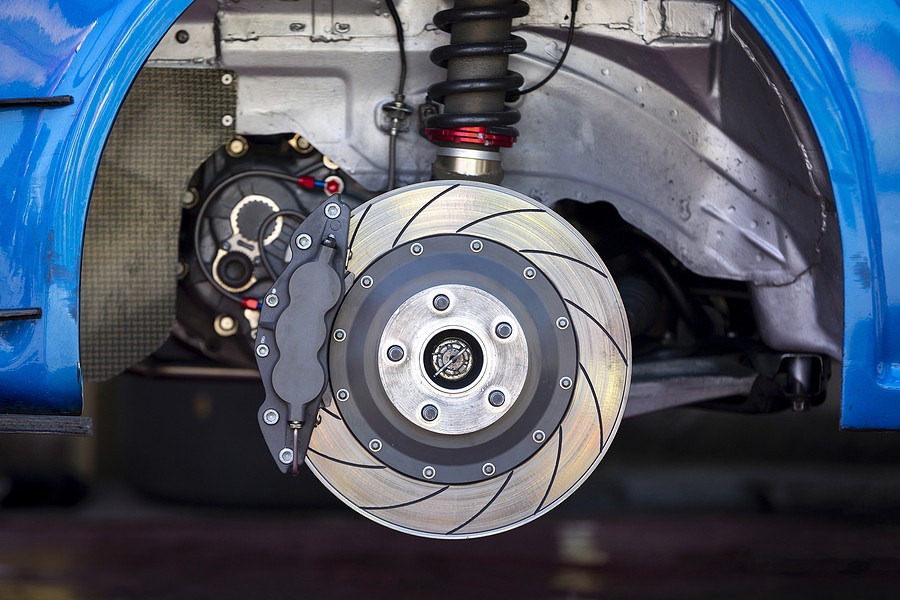
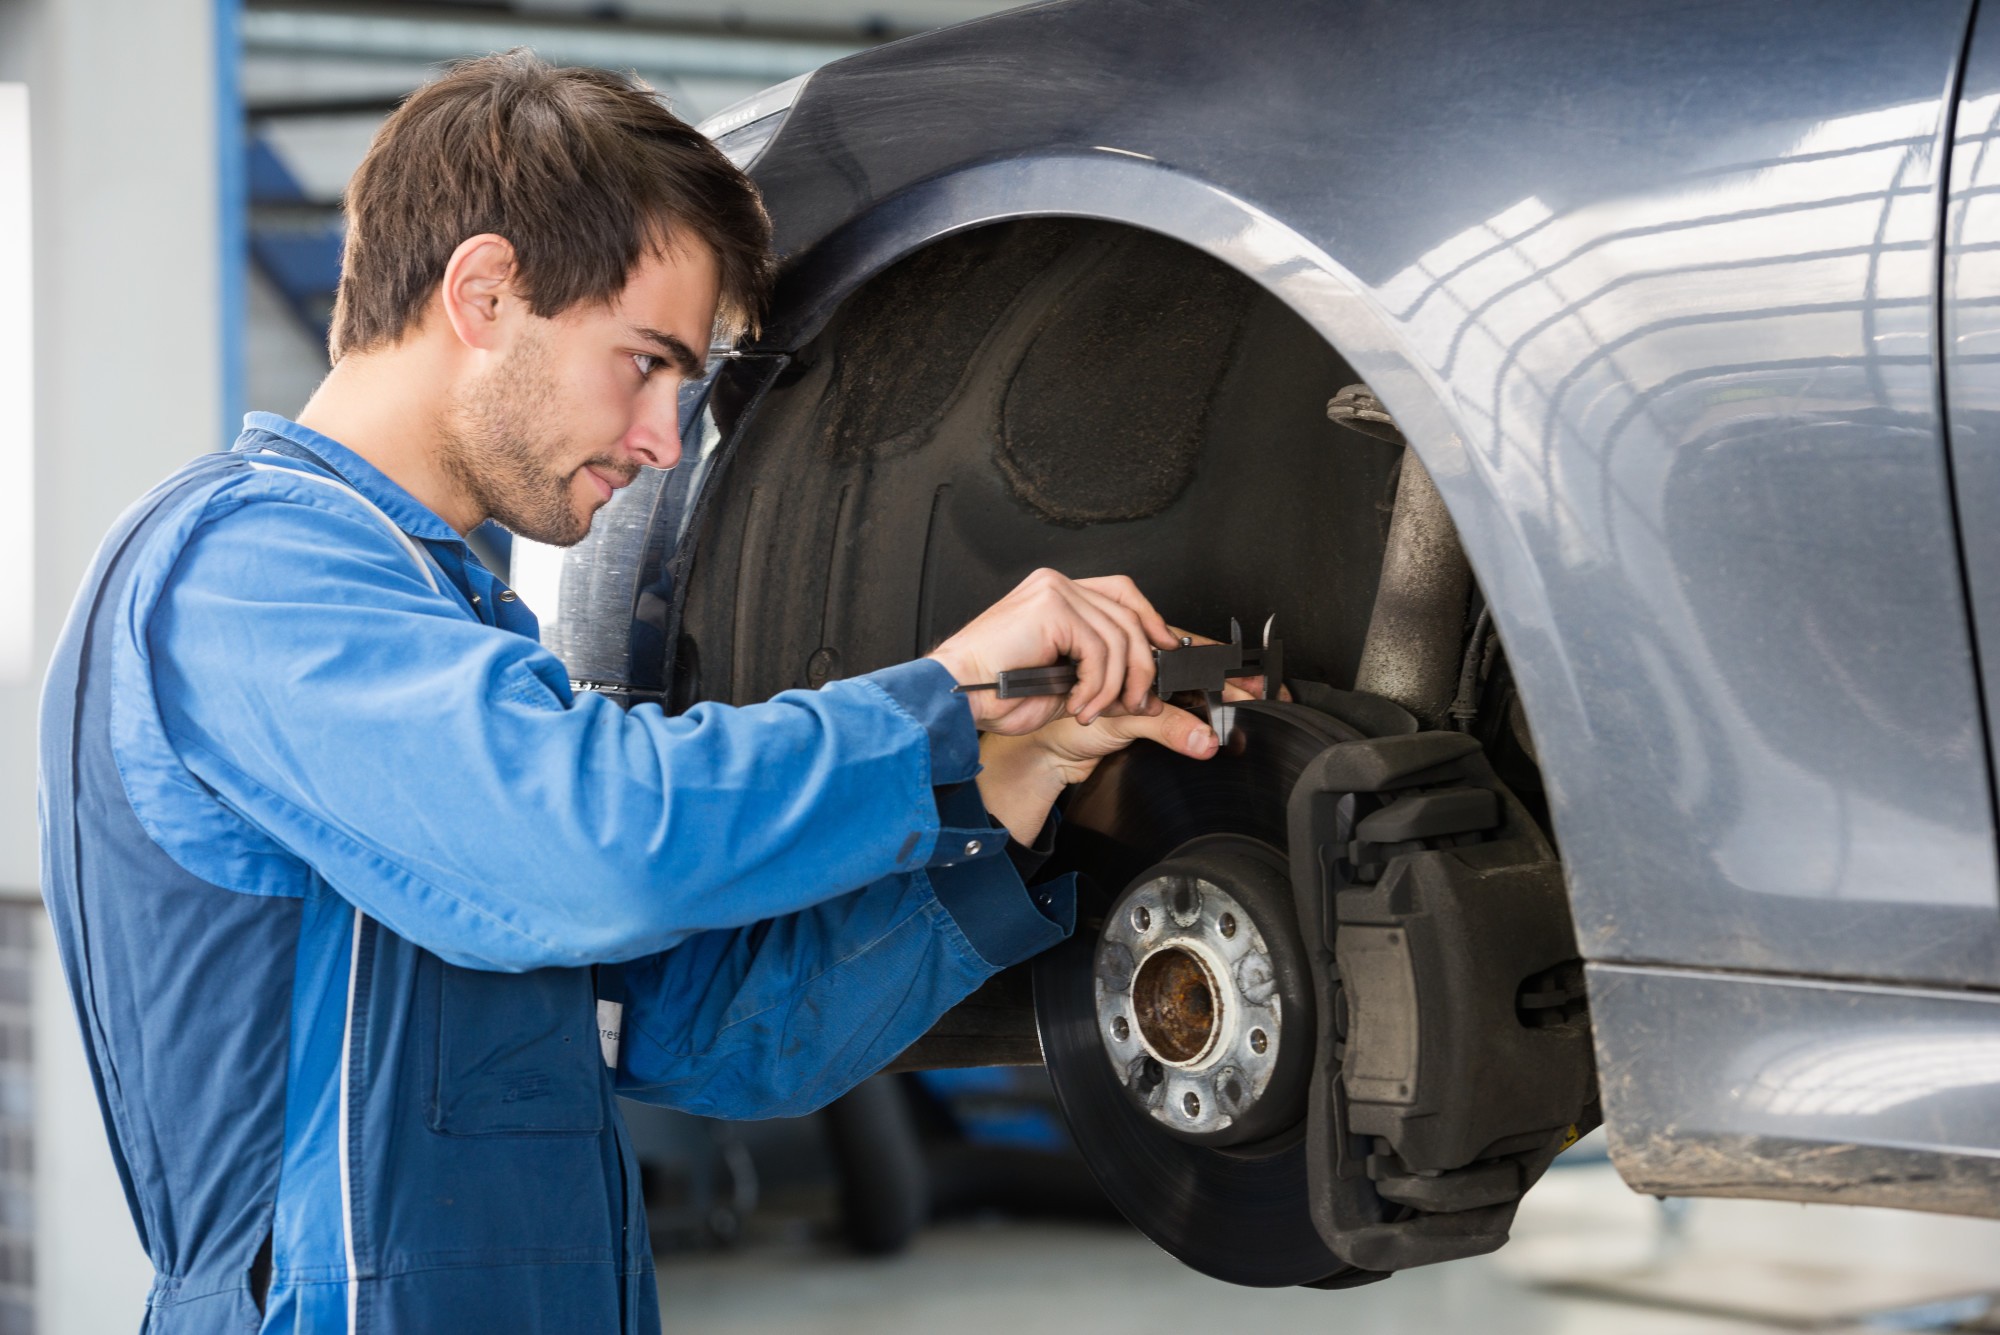
4.1. Locate the Brake Caliper
The brake caliper is the component that houses the brake pads.

4.2. Removing the Caliper
Using a wrench, remove the caliper bolts. Once loose, slide the caliper off the brake discs. Use a bungee cord to hang the caliper. Ensure it doesn’t dangle from the brake line, as this can cause damage.
4.3. Slide Out the Old Brake Pads
With the caliper off, it’s easy to slide out the old brake pads.
4.4. Inspect the Brake Caliper Piston
Check the piston for any damages. It should retract smoothly. If it's difficult to push back, it might need attention.
5. Installing the New Brake Pads
5.1. Preparing the Brake Caliper
Apply brake caliper lube on the points where the brake pads make contact with the caliper. This ensures smooth movement.
5.2. Sliding in the New Brake Pads
Slide the new brake pads into the same position the old ones occupied.
5.3. Re-attaching the Brake Caliper
Once the new pads are in place, slide the brake caliper back over the brake rotor. Ensure it fits snugly.
5.4. Tightening the Caliper Bolts
Use a wrench to tighten the caliper bolts back into place.
6. Wrapping Up
6.1. Replacing the Wheel
Position the wheel back, thread the lug nuts by hand first, then tighten them with a wrench.
6.2. Lowering the Vehicle
Carefully remove the jack stands and lower the vehicle using the jack.
6.3. Tightening the Lug Nuts
Once the car is safely on the ground, use a torque wrench to tighten the lug nuts to the manufacturer's specifications.
6.4. Test Drive
Before hitting the road, do a short test drive. Ensure the brakes are functioning correctly and listen for any unusual noises.
7. Maintenance and Care
7.1. Regular Checks
Regularly inspect your brake pads for wear and tear. Early detection can prevent costly repairs.

7.2. Avoiding Sudden Stops
Braking suddenly wears out brake pads faster. Whenever possible, try to brake gradually.
7.3. Knowing When to Replace
Even if there’s no noise, if the brake pad looks thin, it's time to replace.
7.4. Trust but Verify
Even if you’re confident in your work, occasionally have a professional inspect your brakes. It's an additional safety measure.
1. Prepare for the Job
- Safety First
- Safety should always be your top priority. Before starting, ensure you're in a well-ventilated area and have protective eyewear and gloves. Remember, brake dust can be harmful if inhaled or if it comes into contact with your eyes.
- Gathering Tools and Materials
- A good job begins with the right tools. For this task, you'll need a car jack, jack stands, a lug wrench, socket and ratchet set, a c-clamp or brake caliper tool, and of course, new brake pads. Optionally, consider getting brake cleaner and a small brush.
- Choosing the Right Brake Pads
- Not all brake pads are created equal. They come in different materials like ceramic, organic, and semi-metallic. Each has its pros and cons concerning performance, noise, and dust. Research your car's specifications and consider your driving habits.
- Elevate the Car
- Use the car jack to lift the vehicle. Then, secure it with jack stands for safety. Never work under a car supported only by a jack!
2. Remove the Wheel
- Loosen Lug Nuts
- Before lifting the car, slightly loosen (but do not fully remove) the lug nuts. This makes it easier and safer when the car is elevated.
- Lifting the Relevant Wheel
- Once the car is securely on the jack stands, completely remove the lug nuts and take off the wheel. This will give you clear access to the brake caliper and pads.
3. Access the Brake Caliper
- Locate the Caliper Bolts
- The brake caliper is held in place by two bolts. They're typically located on the backside. Depending on your car model, these could be hex bolts, slider pins, or other types.
- Remove the Caliper
- Using your ratchet set, remove these bolts. Once loosened, you can slide the caliper off the brake pads. Note: be careful not to strain or damage the brake line connected to the caliper.

4. Remove Old Brake Pads
- Slide out the Pads
- The old brake pads will typically be clipped in. They should slide out with a bit of maneuvering. If they seem stuck due to dirt or rust, use a brake cleaner to help loosen them.
- Inspect the Caliper for Damage
- Before proceeding, inspect the caliper piston and the surrounding area. If there are signs of wear or damage, now is a good time for repairs or replacements.
5. Install New Brake Pads
- Clean the Caliper Bracket
- Using a small brush or a piece of cloth, clean any rust or debris from the caliper bracket. This ensures the new pads fit snugly and operate smoothly.
- Compress the Caliper Piston
- Before the new pads can fit in, the caliper piston needs to be fully compressed. Use your c-clamp or brake caliper tool for this.
- Slide in the New Pads
- Once compressed, you can slide the new brake pads into the bracket. Ensure they're facing the right way, with the friction material facing the rotor.
6. Reattach the Brake Caliper
- Position the Caliper Over New Pads
- Carefully position the brake caliper over the new pads. It should fit snugly if the piston is fully compressed.
- Tighten the Caliper Bolts
- Once in place, re-insert and tighten the caliper bolts. Ensure they're secure but don't overtighten.
7. Test the Brakes
- Pump the Brake Pedal
- Before driving anywhere, pump the brake pedal a few times. This ensures the pads are seated and the brake fluid has circulated.
- Drive Slowly and Test
- Start by driving slowly around your driveway or a parking lot. Test the brakes at different speeds, ensuring everything feels right.
- Break-in New Brake Pads
- New brake pads require a break-in period. Avoid sudden stops for the first few hundred miles. Instead, try a series of controlled, moderate brakes to ensure even wear.
Conclusion
In conclusion, while the task might seem daunting at first, replacing your car's brake pads is manageable with careful preparation and patience. Always prioritize safety and don't rush the process. With the right tools and this guide, you're well on your way to ensuring your vehicle remains safe on the roads.