Anyone who has a car must learn the basics of how to check head gasket. After all, a working head gasket effectively seals the engine block and cylinder head of an internal combustion engine (s). Its aim is to keep the coolant and engine oil from seeping into the cylinders by sealing the combustion gases within the cylinders. Leaks in the head gasket can result in poor engine performance and/or overheating. In this article we will learn all about how to check head gasket.
⚠️ If It's Broken, Don't Fix It - Get Paid Cash for Your Vehicle ⚠️

How to Check Head Gasket: Importance of a Head Gasket
To understand the process of how to check a head gasket, let us first discuss the role of a head gasket thoroughly. Because modern cars are frequently built with an engine block and a cylinder head fastened on top, a head gasket is a key seal. This vital component is found between the engine block and the cylinder head. It's a machined casting for an internal combustion engine having cylindrical bored holes for the pistons.
A head gasket serves as a seal between the engine block and the cylinder head. When exposed to compression, this gasket should be able to maintain that sealing requirement and prevent leaking between the two critical engine elements. Simply explained, the objective of a head gasket is to seal the cylinders in order to achieve optimum compression. Furthermore, the gasket separates the flow of oil and water that travel through the engine's block and cylinder head.

A car's head gasket is exposed to numerous elements of the vehicle, including water, oil, exhaust gases, and gasoline. The fact that it contains the compression ratio within your car's combustion chamber demonstrates the significance of a head gasket.
How to Check Head Gasket: What Happens When a Head Gasket Fails
Overheating is usually the cause of a head gasket blowing. This can happen if the engine coolant reaches a temperature where pressure builds up to the same extent that the engine's metal expands. In the vast majority of situations, the water combines with the oil, causing significant engine damage
In rare cases, the compression in the cylinder can cause a perforation or hole in the head gasket, which is known as a blown head gasket. A burst head gasket is often indicated by a rapid pressure rise in the cooling system before the engine achieves a warmed temperature.
It may seem that replacing a gasket should not be so expensive. After all, it is simply a small piece of rubber that sits between the engine block and the cylinder head. Sounds simple enough, doesn't it? But unfortunately, that is not the case. The engine block comprises pistons that move up and down in the cylinder bores and the pistons are linked to rods, which are linked to a crankshaft. This is what drives the vehicle.
The cylinder head is located on top of the engine and contains the valves that open and close, letting air and fuel into the cylinders and expelling waste gas. This is where the head gasket is situated, which means a lot of pieces must be moved out of the way before the head gasket can be accessed. So, while replacing the head gasket isn't particularly expensive, getting there is the difficult part.
The easiest way to avoid a head gasket replacement is to keep your cooling system in good working order. The thermostat, thermostat housing, radiator, and coolant must be regularly checked by a reliable service technician. Replacing or repairing any of these items will be far less expensive than rebuilding the head gasket, much alone replacing the engine if the head gasket breaks and causes extensive damage.
How To Check Head Gasket
Checking the oil and exhaust are the two simplest ways many drivers inspect their head gasket. However, though these are the simplest methods, they are not the only ones you may use to corroborate your suspicions and those methods alone may not always show the whole picture. So here are the seven most effective techniques how to check head gasket:
- Check the Engine Oil
Before we go to the other techniques let us first discuss two of the simplest methods. Examining your engine oil is one of the simplest and most effective techniques to determine if you have a blown head gasket. You can check it by drawing the dipstick. But if you're towards the end of your oil change, it's a lot more effective to drain it and inspect.
A burst head gasket is indicated by engine oil mixed with coolant. You'll know it's blended if your oil has a milky tint instead of the brownish/black hue of spent oil. The more coolant there is, the milkier the hue.
- Check the Exhaust
Check for white smoke coming from the exhaust. If you glance at your exhaust and notice a lot more smoke than usual, you may have a burst head gasket. However, there are a few factors to keep in mind while diagnosing excess exhaust.
For starters, as the ambient temperature decreases, you may expect more exhaust than during the warmer months. This is completely typical and does not imply a burst head gasket. Second, if you have a burst head gasket, you should watch for excessive white smoke, as this is the color that coolant burns if it gets into the combustion chamber.
Finally, sufficient smoke is required for the problem to be a blown head gasket. If the amount of exhaust smoke fluctuates after warming up or on different days, the problem likely isn’t a blown head gasket.
- Check the coolant.
Check if the coolant is overflowing from the tank. Because your coolant is a sealed system, everything you put in it should stay there. And, though the levels may vary somewhat owing to changes in temperature and pressure, they should remain consistent for the most part.
If you find yourself constantly adding coolant to the system despite the fact that there is no obvious leak, there is a significant probability that your coolant is going somewhere it shouldn't be within your engine.
If there is a lot of smoke, it gets into the combustion chamber, and if there is a lot of milky colored oil, it gets into the oil channels. Furthermore, much as oil may change color when it mixes with coolant, if there is oil in the coolant reservoir, you will notice a frothy/milky hue, indicating a problem.
If smoke appears from the coolant reservoir when the coolant cap is removed, this might indicate that compression is entering the coolant system. This may also be tested using an exhaust tester.
- Check the spark plugs.
Oil or coolant on your spark plugs is a sure symptom of a burst head gasket. While this isn't as obvious as looking at your oil or exhaust, it's a certain approach to pinpoint the problem. Simply remove your spark plugs and thoroughly inspect each one. If there is any oil or coolant residue on the tip of the spark plug, you have a problem, most likely a burst head gasket.
- Check the radiator.
Check if the radiator cap is open. When inspecting your radiator, you may look for a few different things. First, a blown head gasket allows air into the cooling system, resulting in a brothy/foamy combination in the radiator. Furthermore, oil and gasoline may be mixed into the system. If this happens, you'll notice a milky-colored mixture when you examine the radiator.
- Do a Compression Test
One effective way of how to check head gasket is by doing a compression check. This is one of the most difficult exams to perform, but it is also one of the most effective. You'll need a few specialized tools for the procedure, and you'll also need to pull the spark plugs. When you remove the spark plugs, make sure to inspect them for coolant or oil residue.
If you have a blown head gasket, you will notice a decrease in compression in the afflicted combustion chamber. This is due to the cylinder's inability to entirely seal, allowing excess pressure to escape. Small leaks, on the other hand, might be difficult to detect using this approach.
- Check For Leaks
While most people are aware that a blown head gasket may cause fluids to leak into other sections of your engine, it is less common to be aware that blown head gaskets can cause exterior leaks. It all depends on where the leak is. If it is towards the exterior of the head gasket, fluid will flow down the exterior of your engine rather than into separate channels.
This might cause smoke to flow out of your engine if it is gathering and burning off before reaching the ground. Alternatively, if it does reach the ground, you might observe fluid pooling under your car. This fluid might be coolant or oil, and the only way to tell whether it's a faulty head gasket is to trace it back to the source of the leak. If it's coming from the head gasket, you've located the source of the problem.
Using a cooling system pressured tool is the simplest approach to verify if coolant is leaking into the oil or the combustion chambers. Simply attach it and leave it pressurized for 10 minutes. As the coolant system is shut, the pressure should be steady.
When the pressure drops, it generally leaks into the oil or the cylinders. Remove the spark plugs and inspect the cylinders for evidence of coolant. Check the dipstick for any traces of coolant in the oil pan as well.
And if ever your vehicle does start to boil over, stop, let it cool for a minimum of one hour, and refill the radiator before you continue.
How to Check Head Gasket: Preventive Maintenance
As mentioned earlier, although the head gasket as a part is not expensive, getting to the head gasket itself is a very laborious and pricey process so it’s best to do preventive maintenance. Besides learning how to check head gasket you must also make sure to check the cooling system regularly.
It is simple to check the cooling system. Do it by making sure there are no leaks, that the radiator is operating well, that the thermostat opens correctly, and that the coolant is at the right level. Also, ensure that the fan (mechanical or electric) is operational, that it has all of its blades, and that it has a shroud over it to maximize efficiency.
The scientific test for suspected head gasket failure is to look for combustion gases in the cooling system. This test will reveal if compression has spilled into the cooling system and, as a result, whether the head gasket has ruptured.
A classic way of doing it would be taking off the radiator cap, starting the car, and looking for bubbles in the coolant. But if there are any additional failure points in the head gasket, they will not be visible, therefore the lack of gasses in the cooling system does not ensure a healthy head gasket. Some older head gaskets simply fail due to poor design and being insufficiently resistant for the purpose.
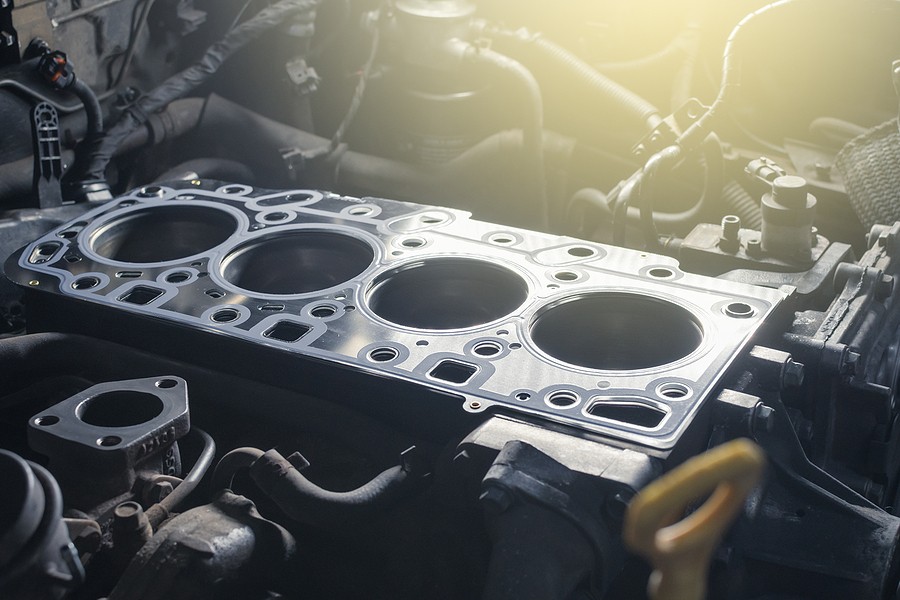
Design issues, however, were more of a concern with older-style metal gaskets, which could only withstand so many years of going from cold to hot with each start-up before disintegrating. Thankfully, contemporary MLS (multiple layer steel) replacement gaskets are now available for the majority of applications, and they offer more dependability than the original gasket design.
Often, a driver would disregard blown head gasket signs owing to the high expense of repairs. A head gasket repair costs between $1,624 and $1,979 on average across the country. The labor charges are expected to be between $909 and $1147, while the parts themselves range between $715 and $832.
Leaving things as they are with a blown head gasket can be an even more costly mistake, because head gasket issues can lead to more car problems if you continue driving. As the saying goes, “prevention is always better than cure. This is especially true in this case. So learn how to check head gasket and have your cooling system regularly checked and maintained. The last thing you want is a blown head gasket.