If you would like to learn about “how to fix an exhaust leak,” follow the simple exhaust leak repair DIY:
⚠️ If It's Broken, Don't Fix It - Get Paid Cash for Your Vehicle ⚠️

- Confirm that you're dealing with an exhaust leak
- Locate the exhaust leak
- Prepare the necessary tools
- Allow your vehicle to cool down
- Exhaust leak repair DIY: problem with the flanges
- Exhaust leak repair DIY: issues with the entire exhaust pipe
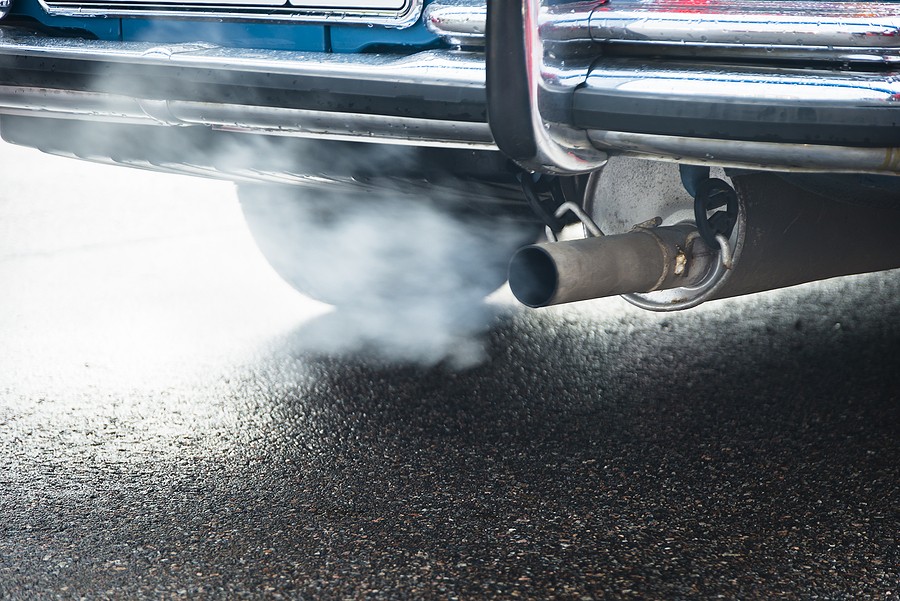
Dealing with exhaust leaks can be a significant situation that might lead to hazardous conditions. Of course, an exhaust leak is not a common condition. Still, it becomes very dangerous when it's big, especially if it's close enough to flammable components around your vehicle, like the fuel system.
Repairing exhaust leaks is a must to prevent a reduction in your vehicle's performance and prevent getting yourself involved in hazardous situations. There are many simple ways to help you locate and fix the exhaust leak yourself without needing a mechanic, so you save a ton on labor costs.
This article provides you with a simple exhaust leak repair DIY pier. It walks you through a step-by-step procedure on fixing an exhaust leak.
What are the common symptoms of an exhaust leak?
Before we dive into the details about “exhaust leak repair DIY and how to fix an exhaust leak,” it is critical that we understand the main symptoms indicating that you're dealing with an exhaust leak. Let's take a closer look at what you will experience when your vehicle's exhaust system leaks:

1. Loud engine noises
One of the first and most common symptoms indicating that you're dealing with an exhaust leak is when you hear weird loud engine noises. These noises become extremely louder whenever you accelerate, and you might even notice that the engine is making some hissing noises or probably intermittent popping noises. Loud noises coming from the engine can be very embarrassing, especially if you're driving around many people. In addition, it can be extremely scary to some inexperienced drivers because it might indicate that your vehicle is dealing with significant trouble.
2. Strong gas smell
When you're dealing with significant exhaust leaks, you might notice some weird gas smell inside your vehicle. This happens when the exhaust leak allows some gas to escape from the damaged areas around the pipe, which might get inside the vehicle.
3. Reduction in the acceleration
Also, when the exhaust system is not working properly and when there is a significant leak, you'll notice that your vehicle is not accelerating or generating the required power as before. For example, if you try to press on the gas pedal, you'll notice that the car gradually loses power, and this issue will not be resolved until you fix the exhaust leak.
4. Reduction in the fuel efficiency
If you are dealing with a gradual reduction in vehicles fuel power, it is not rare to deal with a significant reduction in the fuel economy. You'll notice that your car requires more fuel than it should, and the cylinders won't receive the right air to fuel mixture to generate the correct combustion process, and that's why you'll fill your tank more often than before.
Exhaust leak repair DIY: how to fix an exhaust leak?
When you're in a situation where your vehicle has exhaust leaks, you should not panic because there are some simple DIY's that you can do yourself without needing a professional. Therefore, repair costs won't be as high as you could imagine.
Let's take a closer look at what's automotive experts recommend in terms of the exhaust leak repair DIY to help you learn how to fix an exhaust leak:
1. Confirm that you're dealing with an exhaust leak
Before you move any step further, you must confirm that you're dealing with an exhaust leak. Then, you can easily monitor for any of the mentioned symptoms indicating that your vehicle has a problem with the exhaust. Also, you might want to do a quick visual inspection and look underneath the vehicle to check for any signs of damages in the exhaust pipe.
To make things easier, try spraying some soap and water on the potential damage is around the exhaust pipe and notice how the exhaust leak creates some bubbles as it escapes the exhaust pipe.
2. Locate the exhaust leak
Typically, your vehicles dealing with exhaust leaks uh my facial might be coming from two common locations:
a. The flex pipe
The flex pipe is one of the first and most common locations where you will deal with exhaust leaks if your vehicle suffers from one. This pipe shakes all the time, and as it shakes, there's a very high chance that it will break from certain weak locations causing the exhaust leak.
b. The flange
Another common location that might experience exhaust leaks is the flange where two exhaust pipes are bolted together. Over time of use, the flange gets rusted and becomes weaker and weaker exhaust leak.
3. Prepare the necessary tools
This article provides you with a step-by-step procedure for an exhaust leak repair DIY without needing massive tools that might cost you a lot of money. Instead, it will help you fix the problem using some simple tools that you should have in your house, and even if you don't have them, investing in purchasing them should not cost you a lot of money.
To complete this job, you'll need the following tools:
- Tailpipe expander
- Reciprocating saw
- Exhaust coupler
- Exhaust clamp
- Exhaust RTV
- Extractor set
- MAP gas
- Penetrating fluid
- Some common hand tools
4. Allow your vehicle to cool down
Before you move in a step further in fixing your exhaust, you must allow your vehicle to cool down for some time because the exhaust system can be extremely hot. Therefore, I don't want to cause any risky situations that might result in injuries.
5. Exhaust leak repair DIY: problem with the flanges
If you confirm that your exhaust leak is happening at the flanges, then follow these steps to get rid of it:
a. Inspect the leak severity
Depending on how severe the leak is, you might need to cut a portion of the exhaust system and replace it. For example, if the flanges are completely rusted, there is a very low chance that you can repair them, and therefore, it is better that you use the saw and cut this area and replace it with a coupler pipe and clamps.
However, if your exhaust flange is not bad from both sides, you can only cut one side, replace it with a one-sided flange, and secure it with a clam.
Before you go and purchase a new pipe replacement, you want to make sure that you measure the two exhaust pipes carefully to get the correct size. To do so, use a simple caliper that helps you determine the diameter of each pipe.
b. Cut the damaged part of the exhaust pipe
Once you purchase the right pipe with the correct diameter, the next step is to use the saw and cut the damaged parts of your exhaust system. Before you cut the pipe, you must get rid of the bolt in your way to make the process easier and prevent damages.
To confirm that you are cutting the pipe straight, you can tape around the area where you want to cut and follow this tape line as you cut the pipe.
c. Install the coupler
After cutting the pipe, you want to ensure that the pipe's edges are sanded properly to get a smooth, clean surface before sliding the coupler in place. You can use 180 grit sandpaper or higher to do the job.
Then, slide the coupler on one side of the pipe and do not use a hammer directly to get it inside. Instead, try using a piece of wood and then hammer it on the wood so you don't bend the pipe. After sliding the coupler, you can then use the clamp and secure it in place. Experts recommend putting the clamp upside down, so nothing hits it and breaks the pipe in the future when you drive on the roads.
Repeat the same process on the other side to ensure that the coupler connected the two pipes without any problem.
d. Test for any remaining exhaust leaks
After installing the coupler, you need to perform a quick test to ensure that no leaks remain. To do so, spray some soapy water on the coupler you just installed and trying turn on your vehicle and monitor the behavior of the soapy water. Typically, if you've done the job correctly, you shouldn't see any bubbles coming from the exhaust and the location where we installed a new coupler, but if there is still a problem, you would want to tighten the clams and confirm that there are no other leaks.
e. Apply an RTV if needed
To get better results and prevent any leaks that you are not noticing, it is recommended that you apply an RTV that helps eliminate any leaks designed specifically for these purposes. It is important to note that this RTV can only be applied before you install the coupler, and if you decide to go with it, you'll let your vehicle sit for at least one day before starting it.
6. Exhaust leak repair DIY: issues with the entire exhaust pipe
On the other hand, if you confirmed that the leak is happening at the exhaust pipe itself and you're planning to replace it, follow these simple steps:
a. Jack up your vehicle
Depending on your type, you need to jack up the vehicle to have enough room to work underneath the car without any problems. Note that you'll be cutting the exhaust pipe, and it means that you must have enough room and if your vehicle is a sedan or a smaller car, working underneath it without checking it up might not be efficient.
b. Remove the three bolts connecting the exhaust pipe
The exhaust pipe is typically connected with three main bolts. To remove the old exhaust pipe, you'll disconnect all these bolts. Depending on the exhaust pipe, these bolts might be extremely rusted, which means that it will take you a little bit some time to get rid of them safely without causing damages to the surrounding components.
c. Install the new exhaust pipe
Before you go ahead and install the new exhaust pipe, it is recommended that you compare the old one with the new one to confirm that you purchased the right one. Come other pending on your vehicle's make, model, and year, the auto shop or the location you got it from should give you a detailed recommendation on what piece to purchase.
As you install the new exhaust pipe, it is recommended that you start from the reapportion and make your way to the front portion. Also, you want to sand out all the components connected with the new exhaust pipe to have a clean, smooth surface for a better connection.
Before installing the clam to the rear portion of the exhaust pipe, you must connect all the other bolts and ensure that the pipe is not wiggling in place. Then, you can install the clams, and as we indicated earlier, you want to place them upside down so as you drive the car, nothing from the road breaks them and cause damage to the pipe.
a. Test for any remaining leaks
Finally, spray some soapy water on the new connections of the exhaust pipe and start your vehicle to see any remaining leaks.
Conclusion
Overtime reviews, your exhaust system might leak some gases that could be harmful to you and the environment share. This leak could happen at the flanges or at the pipe itself. Resolving the issue involves cutting the damaged part and installing some couplers to replace the entire pipe.
This article provided you with a detailed exhaust leak repair DIY. That walked you through a step-by-step procedure to fix an exhaust leak by fixing the flanges or replacing the entire exhaust pipe.
Note that at some point in time, your vehicle might be suffering from major mechanical problems. Before you spend some time and effort replacing the exhaust pipe, you might want to evaluate the situation and compare repair costs to your vehicle's value. If you confirm that your vehicle's value is close enough to repair costs, you might want to sell this car and buy a better one that doesn't have any exhaust or other problems.
Cash Cars Buyer is willing to remove your vehicle within one to three days only! Cash Cars Buyer is one of the top-rated car removal companies in the nation that guarantees to pay you the top dollars and provide you with free towing despite your living location around the United States.
Our process is very straightforward and doesn't take more than a couple of days to get your car removed safely and for the most money.
All it takes you is to:
- Describe your car’s type and condition
- Receive our instant free quote
- Accept the quote
- Get your car removed and receive your cash payment on the spot!
To learn more about our process and our teen, you can reach out to us by giving us a call at 866-924-4608 or visit our home page click on the free instant online offer.