If you're dealing with condensation in your headlight, you need to follow these steps to get rid of the problem:
⚠️ If It's Broken, Don't Fix It - Get Paid Cash for Your Vehicle ⚠️

- Step #1: Remove the headlight
- Step #2: Remove the bulbs and other plugs
- Step #3: Dry the moister
- Step #4: Remove the headlight seal
- Step #5: Wipe off the moisture
- Step #6: Reassemble the headlight
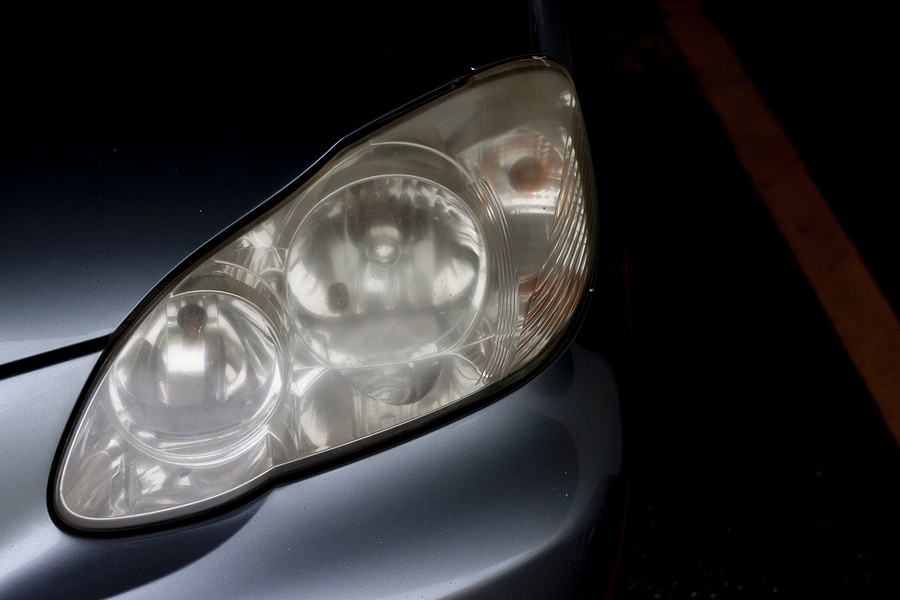
Your vehicle headlights are one of the most critical components in your car that you must keep up with all the time. They impact your visibility, and they also have to do with your safety. The clearer your headlights, the fewer chances you have to deal with visibility issues as you're driving your vehicle.
Unfortunately, headlights do not last forever, and there will be a point when you must replace them because of a burnt bulb or any other problem. However, a very common situation is that people are less likely to understand how to fix it when they have condensation in their headlights.
This article provides all you need to know about the condensation in your headlights. It highlights how critical it is to eliminate this condensation and some solutions for removing minor and major compensations from your headlights.


How does condensation impact your vehicle?
One of the first things you must understand as a driver is that condensation in your headlights is not good. It leads to a lot of negative consequences that might impact your safety.
Here is a small list of all that could go wrong when you have condensations in your headlights:
1. Impacts your visibility at night
One of the most critical consequences of driving a vehicle with condensations in the headlight is that your visibility will be limited, especially during nighttime.
Most of us rely on the headlights when the visibility needs to be clarified, but unfortunately, when you have this condensation, the headlights will not generate the required amount of light you need to see in front of you. That's why it becomes more challenging for you to drive during nighttime.
2. Impacts your visibility and other situations
Not only during nighttime but also when you have limited visibility, you'll have problems whenever you have condensation in your headlights. In other words, imagine that you're driving during foggy days or during the day when you're trying to drive early in the morning and visibility is not clear; imagine what could happen if you even have condensation in your headlights and the headlights are not generating the required amount of rays to see in front of you.
3. Impacts your safety
Your safety will be significantly impacted when you can't see in front of you during nighttime or with limited visibility. You won't be able to see people in front of you, which becomes more dangerous if the other people driving on the road don't have clear lights.
Have you ever been in a situation where someone driving next to you forgot to turn on the headlights? That could happen, and if you're not looking and seeing clearly in front of you, chances are you’ll get involved in car accidents.

Condensation in your headlights call on how to fix?
Now you have some understanding of what could go wrong if you were driving a vehicle with condensation and your headlights; the next step is to understand what you need to do to get rid of this condensation.
The one thing to keep in mind is that dealing with minor condensation is not the same as dealing with major compensation. Each situation is different, and if you plan to remove this condensation, you must follow a different procedure.
Let's take a closer look below at automotive experts’ recommendations on how to get rid of condensation when it's minor or major:
1. Minor condensation
If your vehicle has a couple of minor condensations on the headlights, you're very lucky. You don't necessarily have to deal with lots of steps and buy many elements to get rid of the problem because it's something you can get rid of easily.
First, it's important to know that if your conversation is minor, you don't need to do a very significant step: breaking the seal around the headlights. This particular step causes many issues because you must follow certain steps to confirm that the headlights are completely sealed.
Therefore, removing minor headlines only requires the followings:
– Step#1: Locate the housing vent
The first step in removing the minor condensation is to find the housing event. This vent is located in different locations depending on your vehicle’s make, model, and peer; therefore, you should go to your vehicle’s owner’s manual and get an idea about where this event is located.
Keep in mind that not all vehicles have the same type of events which depends heavily on the vehicle design. However, in general, there should be an event located somewhere to avoid headlight condensation buildup.
– Step#2: Check vent blockage
In general, if your car has a minor condensation, it's most likely related to some blockage in the vent. Therefore, once you locate the headlight vent, see what you can do to eliminate any blockage there.
For example, debris or contaminants might prevent this vent from doing its job. In that case, you found the solution.
– Step#3: Remove the blockage
Once you confirm that the vehicle has some blockage in the vents, the next step is to get rid of this debris. You can use simple items and tools that help you remove the debris without causing any damage to the surrounding components.
For example, you can try using uh microfiber cloth and wipe out the vent, or if the blockage is more complicated, you can rely on a simple small air compressor. Be careful when using these components because you want to avoid fixing the problem while simultaneously causing other problems.

2. Major condensation
Unfortunately, many people notice the headlight’s condensation when it's major. In that case, you'll need to follow certain procedures that might be tricky and expensive.
These procedures might require bringing in a professional or using certain tools. This all depends on the severity of the condensation and your budget for the decision procedure.
– Step #1: Remove the headlight
In many situations, the professional, or if you're planning to do it yourself, must remove the headlight. This involves breaking the seals around the headlights, which requires additional steps to seal them back.
– Step #2: Remove the bulbs and other plugs
Depending on your vehicle’s owner’s manual, there should be uh location where you understand exactly how to remove the bulbs and the other electric connections.
As you already know, the headlights are connected to the electric system in your vehicle, and to make sure that you're removing the headlights carefully, you have to understand how these wires and connections are related and where exactly you need to take things off, so you're ready to take care of the condensation on the vehicle headlights.
– Step #3: dry the moister
Once you remove the headlights, the next step is to remove any moisture. You can first start by wiping it with a dry microfiber cloth. But also, you might need to use a hair dryer to ensure that you dry the moisture without causing damage to the seals.
It would be best to allow your headlights to cool down before moving forward with any additional steps.
– Step #4: Remove the headlight seal
As we mentioned earlier, the last thing you want to do is to get to the point where you have to remove the headlight seals. However, there might be a situation where your conversation is more severe and requires removing the seals.
If that's the case, you need to follow your vehicle’s owner’s manuals recommendations on how exactly you can remove the seals without causing some damage to the surrounding components and without losing the headlights.
Sometimes removing the seals might require a heat gun, which means a complicated job requiring a professional or a certain level of skill sets that you have to build.
Suppose you find it very complicated to remove the seals. In that case, it's better to communicate with a professional willing to do the job without the risk of causing damage to the surrounding components.
– Step #5: wipe off the moisture
Once the seals are removed carefully, the next step is to wipe off any remaining moisture you couldn't get to when you use the hair dryer. Be careful as you're cleaning and wiping off this moisture because if there is any debris or contaminants comma it might cause scratches to the headlights, and this becomes a more complicated job that requires a certain advanced level of skills to be fixed.
Sometimes, the moisture might be a little bit rough. In that case, you should use additional tools and ideas like relying on silica gel packs. These packs are designed in a way that you can place someone on the surface, and they soak up the moisture without causing damage.
– Step #6: reassemble the headlight
In reverse order, you can reassemble the headlights and put them back. The one thing to remember is that you need to focus on the seals and ensure that the headlights are sealed carefully and securely.
If the headlights are not sealed, then all you've done is introduce additional ways for moisture to get inside the headlights and cause additional condensation, which might require some help from a professional.
Before you reassemble the headlights, you want to ensure that you didn't leave any additional compensation in the headlights because you want to avoid repeating the process. You’ve already gone through the previous steps to remove all remaining moisture.

How to prevent condensation in your headlight in the future?
As you might notice, removing condensation in your headlights is a complex job. That's why automotive experts always like to provide recommendations on how to prevent condensation in the first place. Let's like take a closer look at some of these recommendations below:
1. Inspect the seals regularly
As we mentioned earlier, the first and most common reason for condensation in your headlights is when there is a breakage in the seals. That's why it's critical for you as a driver to look between now and then at the headlights and confirm that the seals are in good condition.
2. Replace the seals if necessary
If you find out that some of the seals are broken, you should talk to your mechanic and consider ways to replace the seals and secure the connection between the headlights and the vehicle to ensure that normally Sir can come inside.
3. Inspected the O rings and the electric connectors
Also, it is important for you as a driver to inspect the different connectors between the headlights and the vehicle. For example, some of the O rings or the electric connections might get damaged, and if that's the case, fixing them is a great idea and prevents future issues you don't want to deal with.

Condensation in your headlight: Final thoughts
Condensation and your headlights can be very dangerous, especially if it impacts your visibility as you're driving on foggy days or probably at night.
You, as a driver, must get rid of this condensation as soon as possible and before it gets more complicated.
This article highlighted a step-by-step process to eliminate minor and major condensations in your vehicle. We indicated how critical it is when condensation becomes major because this requires some help from professionals in some scenarios.
Suppose you feel that removing the condensation from your headlights requires much support from professionals and a lot of money. In that case, you need to evaluate the situation carefully and see if it's even worth fixing the headlights this way or replacing them.
In some instances, you might find it's not even worth fixing this vehicle because of additional problems in major components like the engine or the transmission. If that's the case, you'd better still this vehicle and look for a better one that does not have any problem.
If you're ever looking for someone to buy your car, Cash Cars Buyer is always here to help you!
Cash Cars Buyer is one of the top-rated car removal companies in the nation that guarantees to pay you the top dollars and provide you with free towing despite your living location around the United States.
Our process is straightforward and doesn't take more than removing your car safely and for the most money.
All it takes you is to:
- Describe your car's type and condition
- Receive our instant free quote
- Accept the quote
- Get your car removed and receive your cash payment on the spot!
To learn more about our process and team, call us at (866) 924-4608 or by visiting our home page and clicking on the free instant online offer.